
Two Factored Authentication with Twilio Authy
What is two factored authentication? It’s an added layer of security. Generally combining something you know with something you have to authenticate you.
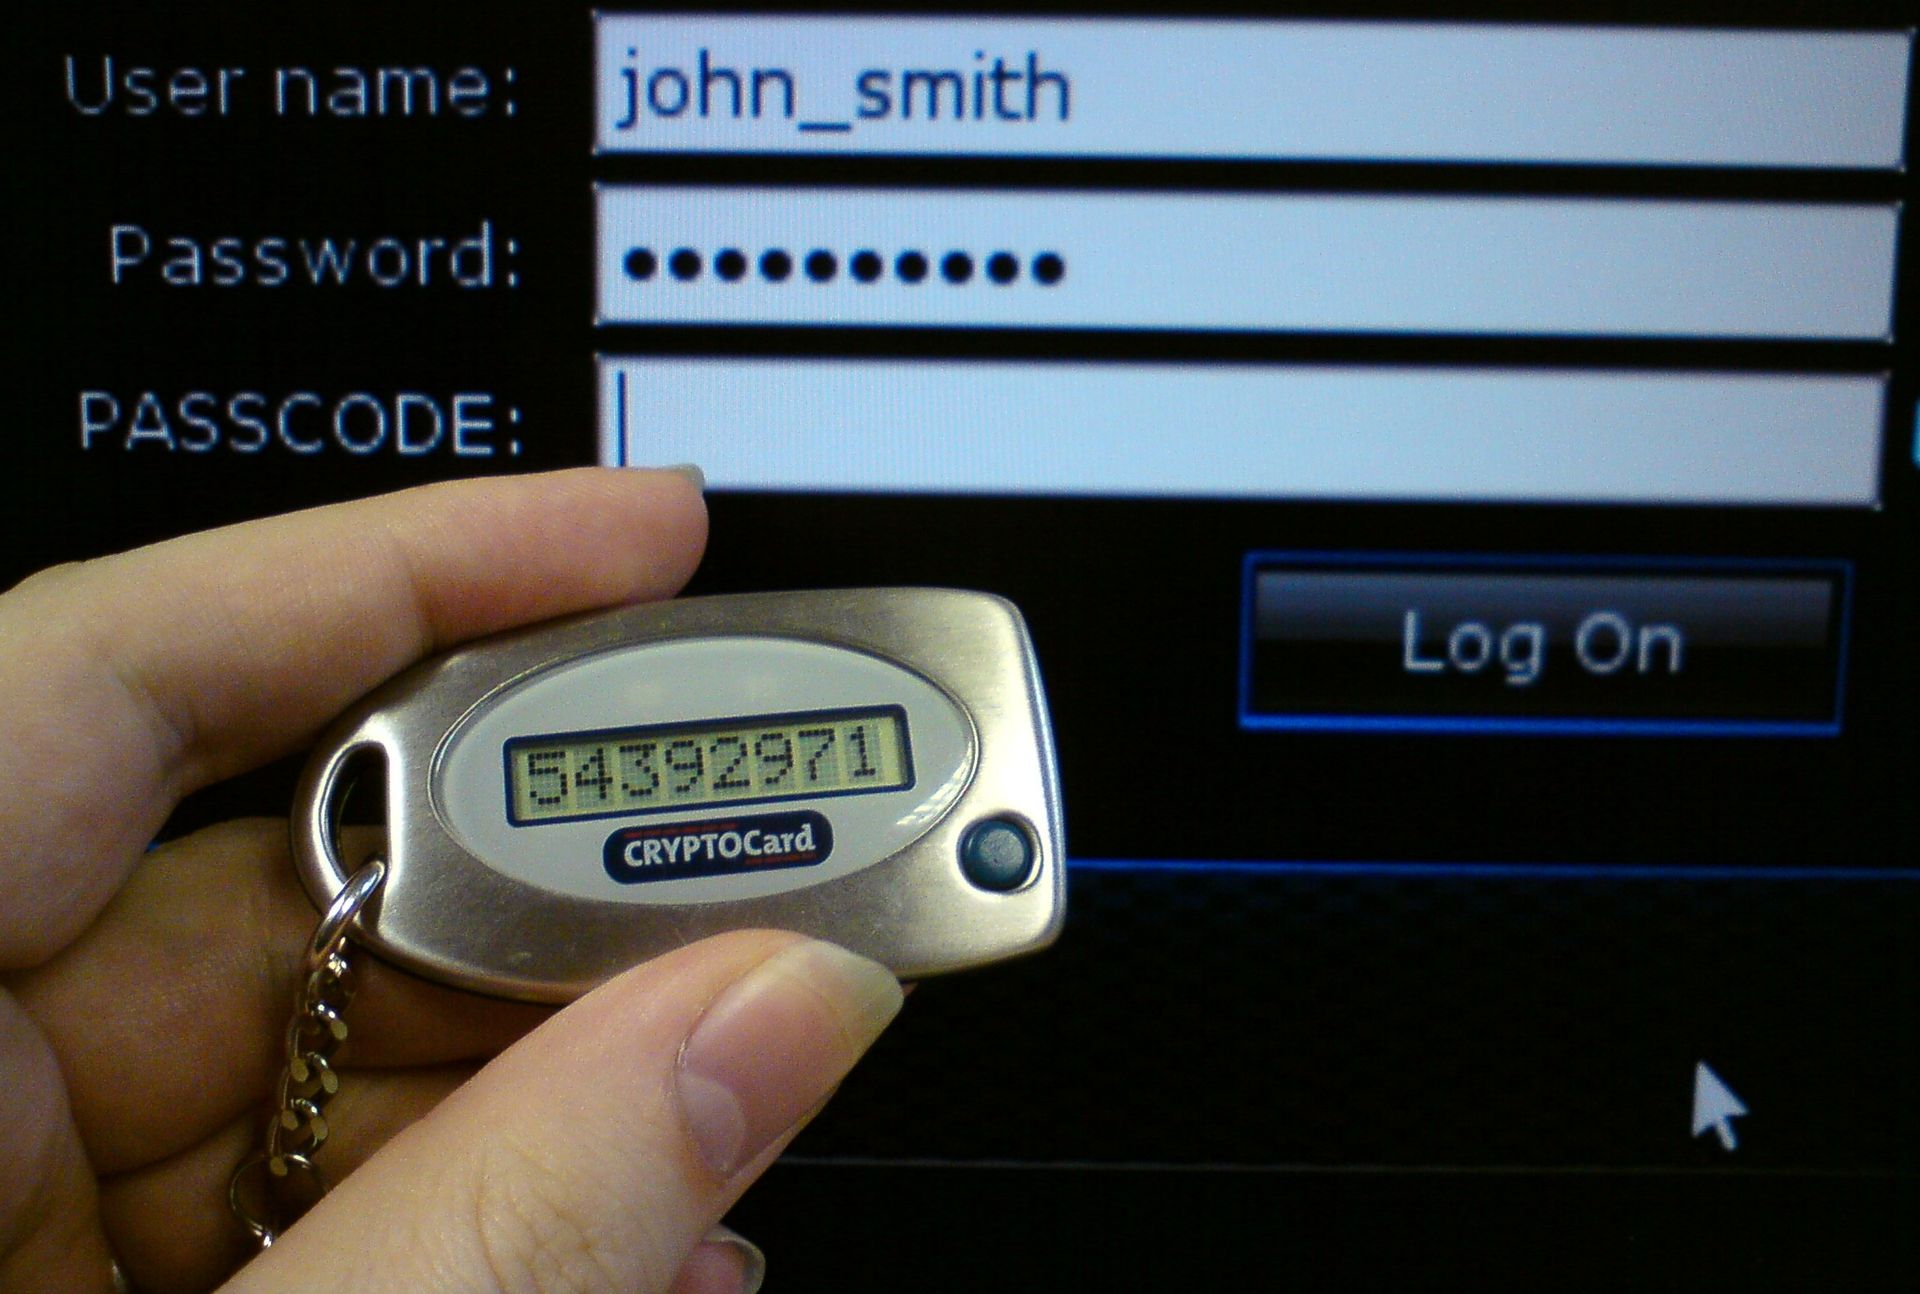
An every day example will be your ATM card. You need the card itself (The thing you have), and the pin number (The thing you know) in order to use the card to withdraw money. Or you might have seen someone use a disconnected token generator (A key ring like thing that generates security tokens.) to enter a security token along with their username and password to access a secure application.
Huh, sounds expensive!
Now you might be wondering “Ok, great. Do I put a card reader in my computer now?”! You can do that, in fact some already have done it in private, government and military organizations. Some people even use pin codes, access cards, voice prints, finger prints, iris scans etc., to implement two/multi factored authentication.
However that’s not very practical if your software has users across the globe. I mean, are you going to buy all of your users specialized hardware? I know if G-Mail waned me to buy a fingerprint scanner, I will not be using G-Mail!
Better way.
Luckily there’s a simple alternative. You know your username and password, you have a phone, an email address or an smartphone capable of running applications. We can combine them to create a two factored authentication mechanism. When you sign in using a username and password, you can use an SMS or an E-Mail containing a generated security token that will then need to be entered to completely authenticate the user.
Expensive security hardware isn’t necessary for most systems, with an obvious exception to military and high security systems.
Sounds like more work :(
Now it will probably take you a few days (or weeks) to create a service like this on you own, and if you are just prototyping something, or just creating a proof of concept application, or just want to cut off as much work off from your plate as possible, you will want a third party that can provide the services you want.
Authy by Twilio
Twilio is offering a great service for two factored authentication. The’ve named it Authy and it provides some pretty easy to integrate services.
You can use an SMS to send the security token, or the users can use Authy smart phone application to get a soft security token.
They also have a service called OneTouch, that requires an authorization for a request through the smart phone app. In case you don’t want to use their application, they provide an SDK that you can integrate into your own mobile application.
Demo
Let’s create a small demo with Authy and see how we can get it to work for us. I’ll be only going through the parts that are relevant to this integration.
The rest is just for the sake of app completion.
Getting started.
You will need Node and NPM installed, I’m using some ES6 features so I need a version of Node higher than 6. But you can use whatever you are comfortable with.
You need to create an application from the Authy dashboard after signing up for their free trial. Then get the API key for the application.
Then you will need to install the authy node sdk to get started easily. There’s nothing stopping you from directly using their RESTful API yourself, if for some bizarre reason you’d want to.
npm install --save authy
Now there’s a bunch of code in the demo application that’s not really Authy specific so we will skip that and focus on what matters.
Initializing the API
Pretty easy first step! Simply initialize it like this,
let authy = require("authy")("YOUR APPLICATION API KEY");
Creating a new Authy user.
Now before we can do anything, we need to register and create a new user with Authy. You need to capture a user’s country code and phone number in order to do so.
You invoke the register user function in the sdk like this.
authy.register_user(userName, phone, countryCode, (err, res) => {
    if (err) {
        console.log(err);
        return;
    }
    let authyID = res.user.id;
});
Upon successful registration the API will return an ID to identify the user within Authy. Save it somewhere! You need it later.
Sending a security token
User is setup and he has successfully entered the username and the password, so how do you send the security token to him?
Like this!
authy.request_sms(user.authyID, (err, res) => {
    if (err) {
        console.log(err);
        return;
    }

    callback(null, user);
});
This piece of code tells Authy to send a security token through SMS to the user specified by the id we saved when
registering the user. If the user have downloaded the smart phone app, he/she will not receive the SMS, you can use a
token retrieved by the app. There’s a setting in the Authy dashboard that will let you send the SMS regardless of the
app download status if that’s what you want!
Validating the security token
Now to validate the token entered by the user,
verifyAuthyCode(authyID, token, callback) {
    authy.verify(authyID, token, (err, res) => {
        if (err) {
            console.log(err); //Invalid token is an error!
        }

        console.log("Valid token!");
    });
}
If the token is invalid, it’s an error. And the err object will typically look like this,
{
	"message": "Token is invalid",
	"token": "is invalid",
	"success": false,
	"errors": {
		"message": "Token is invalid"
	},
	"error_code": "60020"
}
If the token is valid then the err will be null and you will get a response like this,
{
  "message": "Token is valid.",
  "token": "is valid",
  "success": "true"
}
OneTouch API
Let’s see how we can use Authy’s OneTouch capabilities, to replace or compliment the token based verification.
First you need to create a OneTouch request for the user to accept or deny. The current node SDK doesn’t really have direct support for the OneTouch API, but we can use some of it’s generic functionality to reduce the work we will need to do.
There are two endpoints you need to be aware of.
-
The request making endpoint
/onetouch/json/users/<authy user id>/approval_requests -
The request status checking endpoint
/onetouch/json/approval_requests/<one touch request id>
Making the one touch request
We can leverage the node sdk to make a one touch request like this,
let url = `/onetouch/json/users/${authyUserID}/approval_requests`;

authy._request("post", url, {
    "details[Email Address]": userName,
    "message": "Please authorize login to the registration demo app."
}, (err, response) => {
    if (err) {
        console.log(err);
    }
    let oneTouchUUID = response.approval_request.uuid;
});
Node that we are concatenating the authy user id into the URL of the api. The SDK will take care of the endpoint that
will be used.
We can provide the message that will be displayed in the smart phone app when making this request, in this case, “Please authorize login to the registration demo app.”.
The response from this API call will contain the request uuid (request id), save it somewhere (may be the session?)
because you will need it to check the request status.
The request you’d receive on the app will look like this,
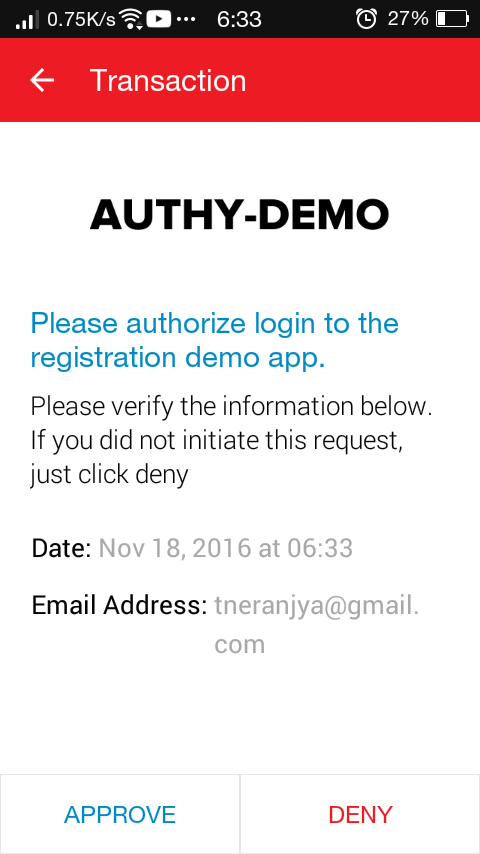
Note the message and the email address in there, that’s what we provided while making the request.
Verifying request status
After the request is made, we need to check the status of the said request. There are three states that the request can be in,
- pending - User hasn’t responded either way to the request.
- denied - User has denied the request, authentication is a no-go.
- approved - User has approved the request, authntication complete, in you go.
We can check the request status using the request id (uuid) we got when creating the request,
let url = `/onetouch/json/approval_requests/${uuid}`;

authy._request("get", url, {}, (err, response) => {
    if (err) {
        return console.log(err);
    }
    let status = response.approval_request.status;

    console.log(status);
});
Now on the front end you check this pretty much anyway you like, in the demo app I chose to check it every 1 second, until the request is either “denied” or “approved”.
The front end code for the demo looks like this,
$.get("/oneTouchAuth",{}, function (responseData) {
    if(responseData.success){
        if(responseData.status == "pending"){
            console.log("Request pending");
            setTimeout(checkOneTouchStatus, 1000);
        } else if(responseData.status == "denied") {
            console.log("One Touch Denied.");
            $("#statusText").html("One Touch request denied. Redirecting. in 3 seconds..");
            setTimeout(redirectOnFailure, 3000);
        } else if(responseData.status == "approved") {
            $("#statusText").html("One Touch request approved. Redirecting. in 3 seconds..");
            setTimeout(redirectOnSuccess, 3000);
        }
    } else {
        $("#errorDiv").html(responseData.error.message);
        setTimeout(checkOneTouchStatus, 1000);
    }
});
Conclusion
And there you go, integration completed. I’ve pushed the code to github and deployed it on heroku. I don’t know how long the heroku link will work, I might replace it if I need to host some other application!
Github : https://github.com/thihara/authy-demo
Heroku : https://tranquil-lowlands-41989.herokuapp.com/
I just love Heroku’s auto generated application names!