
Creating a Search Backend with Elastic Search. Part 1 - Introduction
Overview
Elasticsearch is a popular search and analytical engine. The core of it open source and it’s built on top of Apache Lucene. There is a close competitor so Elasticsearch named Apache Solr, which is also built on top of Lucene and is a very good search engine; however Solr is beyond the scope of this series.
In this series of blog posts we will be focusing on providing a usabke
Elasticsearch have a set of complimentary technologies, and all of these combined is called the elastic stack.
Elastic stack consists of
- Elasticsearch - The core search engine and data store
- Kibana - A visualization platform for data in elasticsearch
- Beats - A set of tools for collecting data from machines (read servers, mostly) and sending it to either elasticsearch or logstash. Beats have tools for collecting files as well as system metrics like CPU, memory usage, etc.
- Logstash - A tool to input data into elastic search. Originally written to ingest logs, it has now evolved with it’s own set of plugins, and can handle a wide veriety of data.
We will touch on all of these as this series of posts progress.
What will be build?
We are going to build a search engine that can perform full text search on data and manage relevance. That sounds really simple, but the devils in the details.
For example how will we handle synonyms, and similes in our search results? How do we handle relevance of a term? Is
car for sale the same as toyota for sale which one matches our search query best, and should therefor be placed
at the top of the results?
We will cover all of these as the series progresses, and build a working search backend.
Installation
First let’s get started by installing Elasticsearch and Kibana. We will use Kibana to run queries against elasticsearch. It has an easier to read interface than plain cURL.
You can download Elasticsearch and Kibana from https://www.elastic.co/downloads/
For macOS and Linux installing Elasticsearch and Kibana is both as easy as extracting the zip files and running the startup commands.
Running Elasticsearch
Once extracted goto the bin directory in Elasticsearch and run ./elasticsearch command for easy startup.
There are many ways to configure elasticsearch. We can configure the nodes and shards for scalability and reliability. We can deploy these nodes across a cluster of machines. We will look at all these in detail in the post discussins scalability of elasticsearch.
Once the Elasticsearch server is up we can see the default port it started on by observing the console output.
[2020-02-25T14:41:37,832][INFO ][o.e.t.TransportService   ] [Thiharas-MacBook-Pro.local] publish_address
{127.0.0.1:9300}, bound_addresses {[::1]:9300}, {127.0.0.1:9300}, {127.94.0.1:9300}
As you can see it started on port 9300 by default.
You can quickly verify if everything is running by using the following cURL command.
curl -XGET "http://localhost:9200/_cat/health?v"
The result’s would be similar to this if everything is OK. Note the status column is marked as green
epoch      timestamp cluster       status node.total node.data shards pri relo init unassign pending_tasks max_task_wait_time active_shards_percent
1583163045 15:30:45  elasticsearch green           1         1      6   6    0    0        0             0                  -                100.0%
Running Kibana
Once elasticsearch is running you can do the same thing to run Kibana. Navigate to the bin directory inside the
extracted directory and run ./kibana command.
Verifying Installation
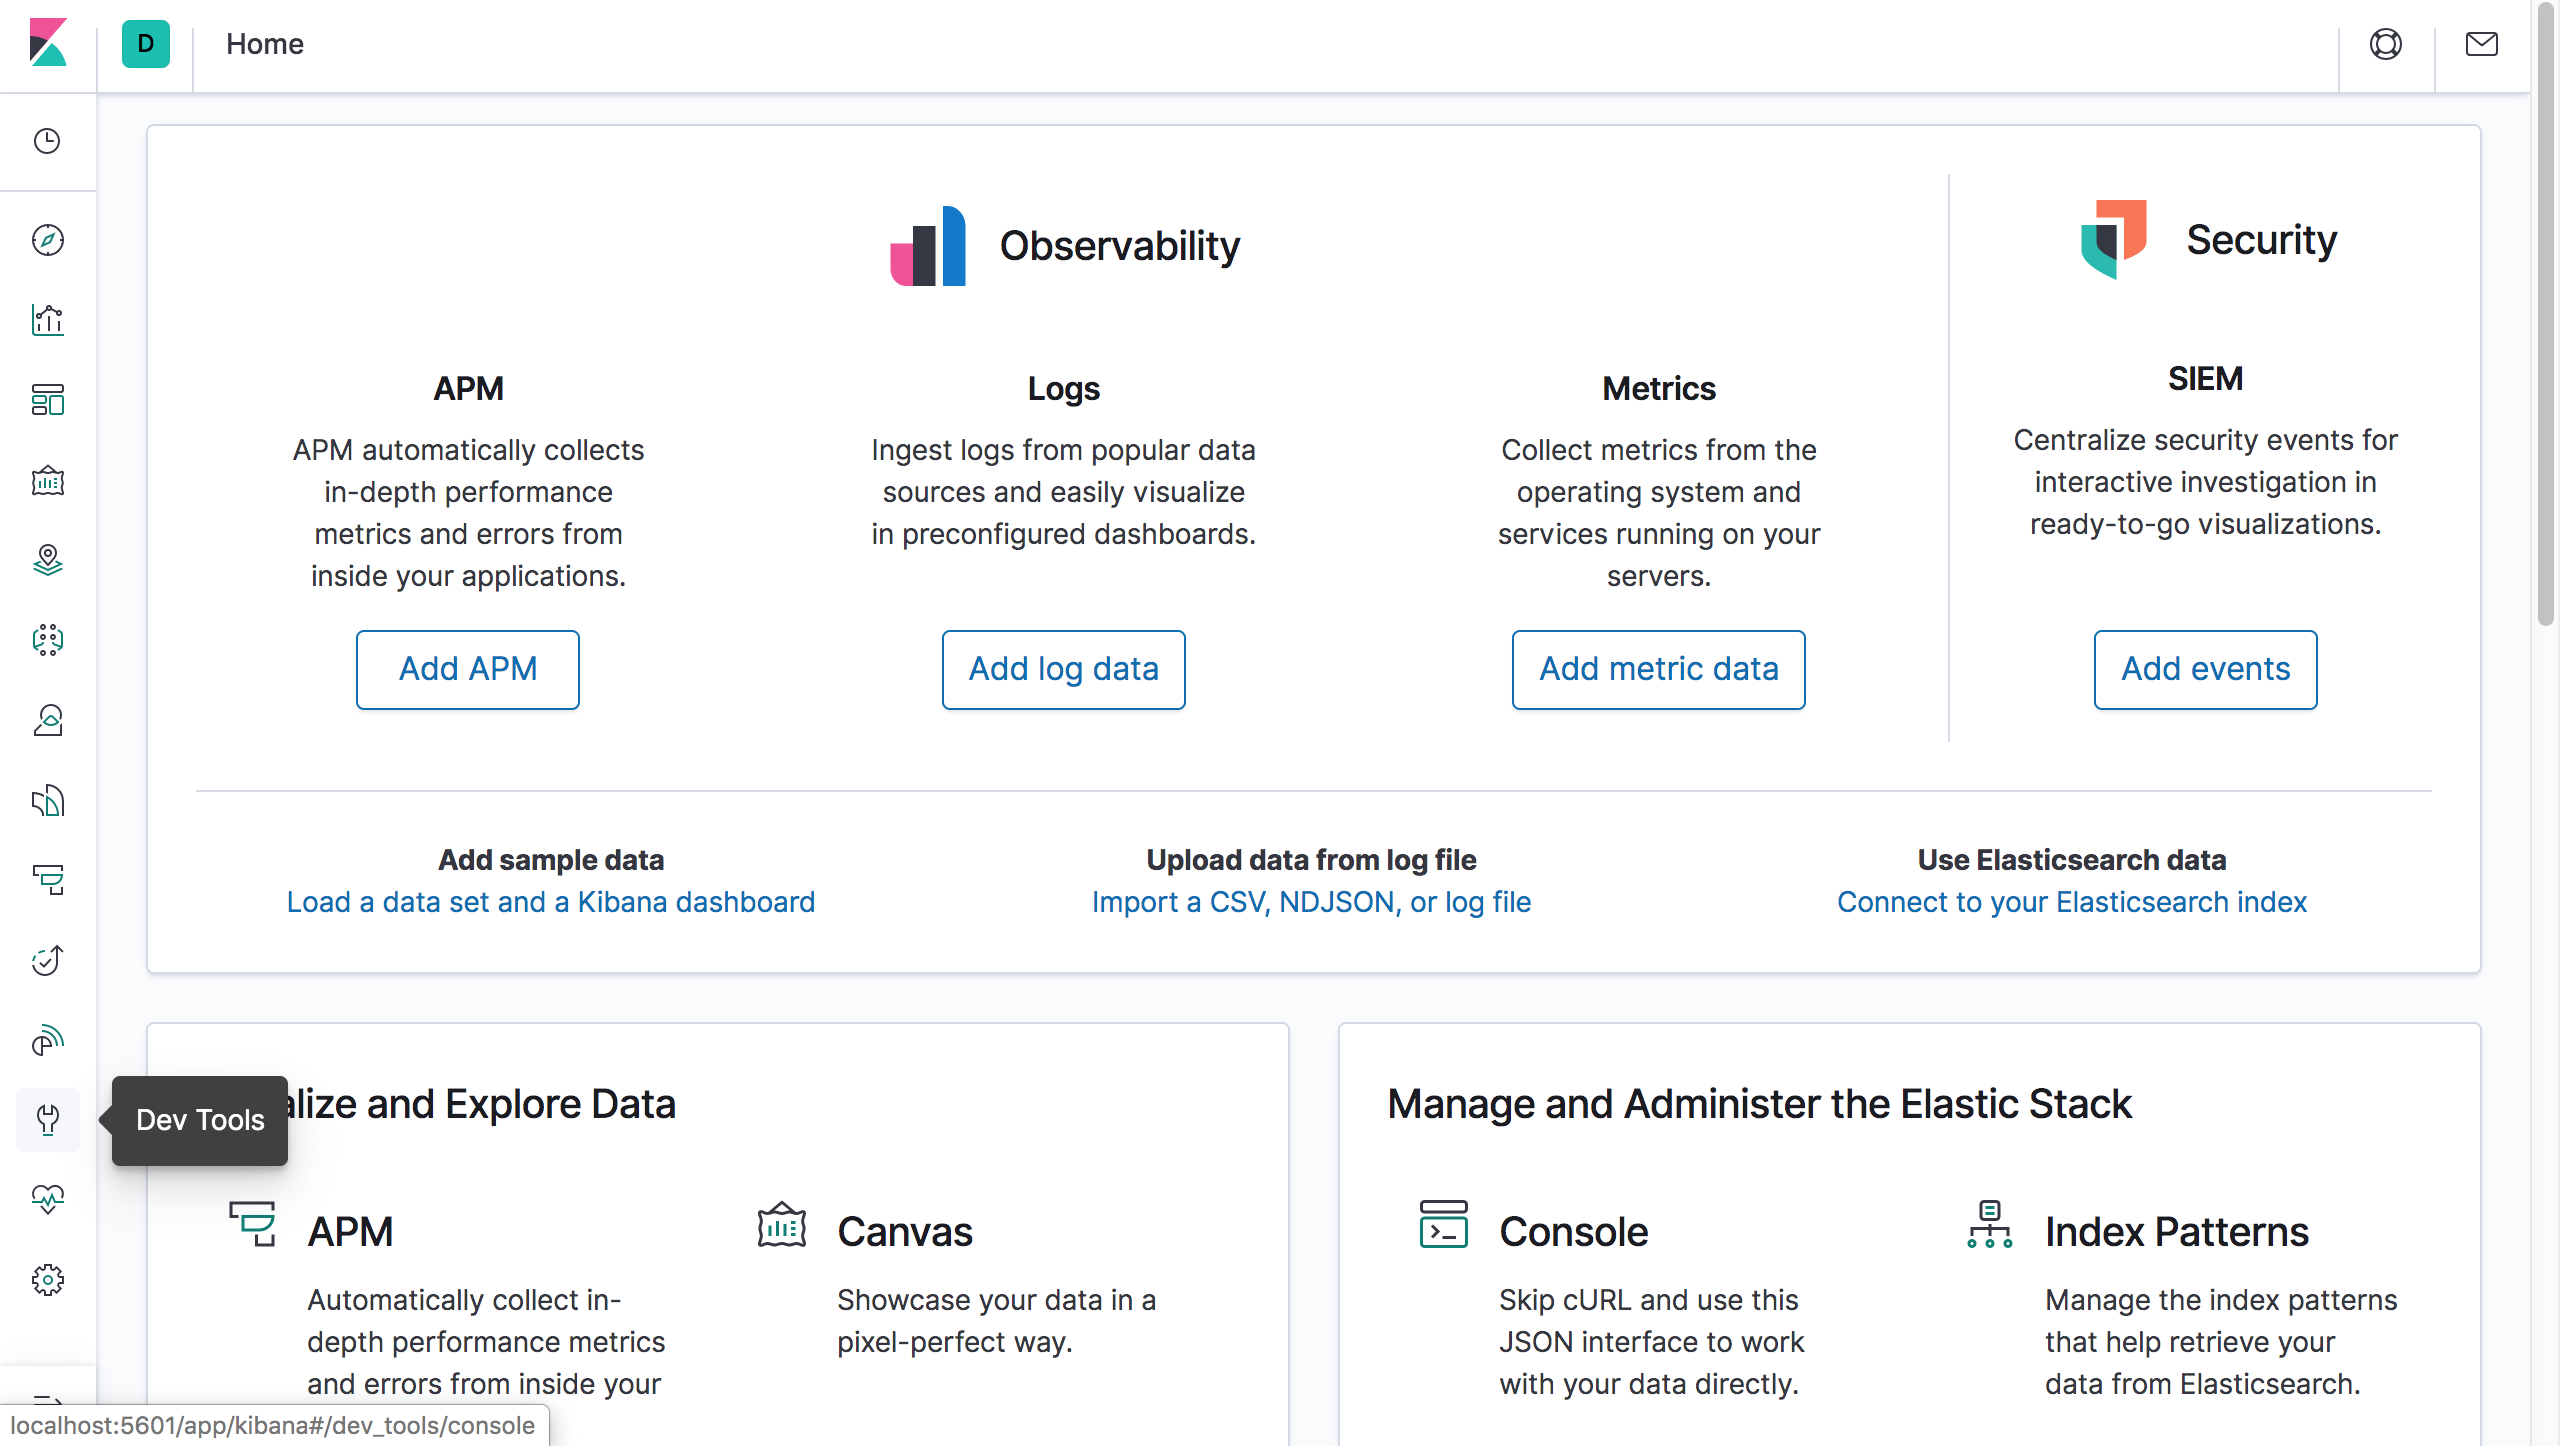
Kibana runs on http://localhost:5601/ by default. So let’s navigate there and move to the developer tools section.
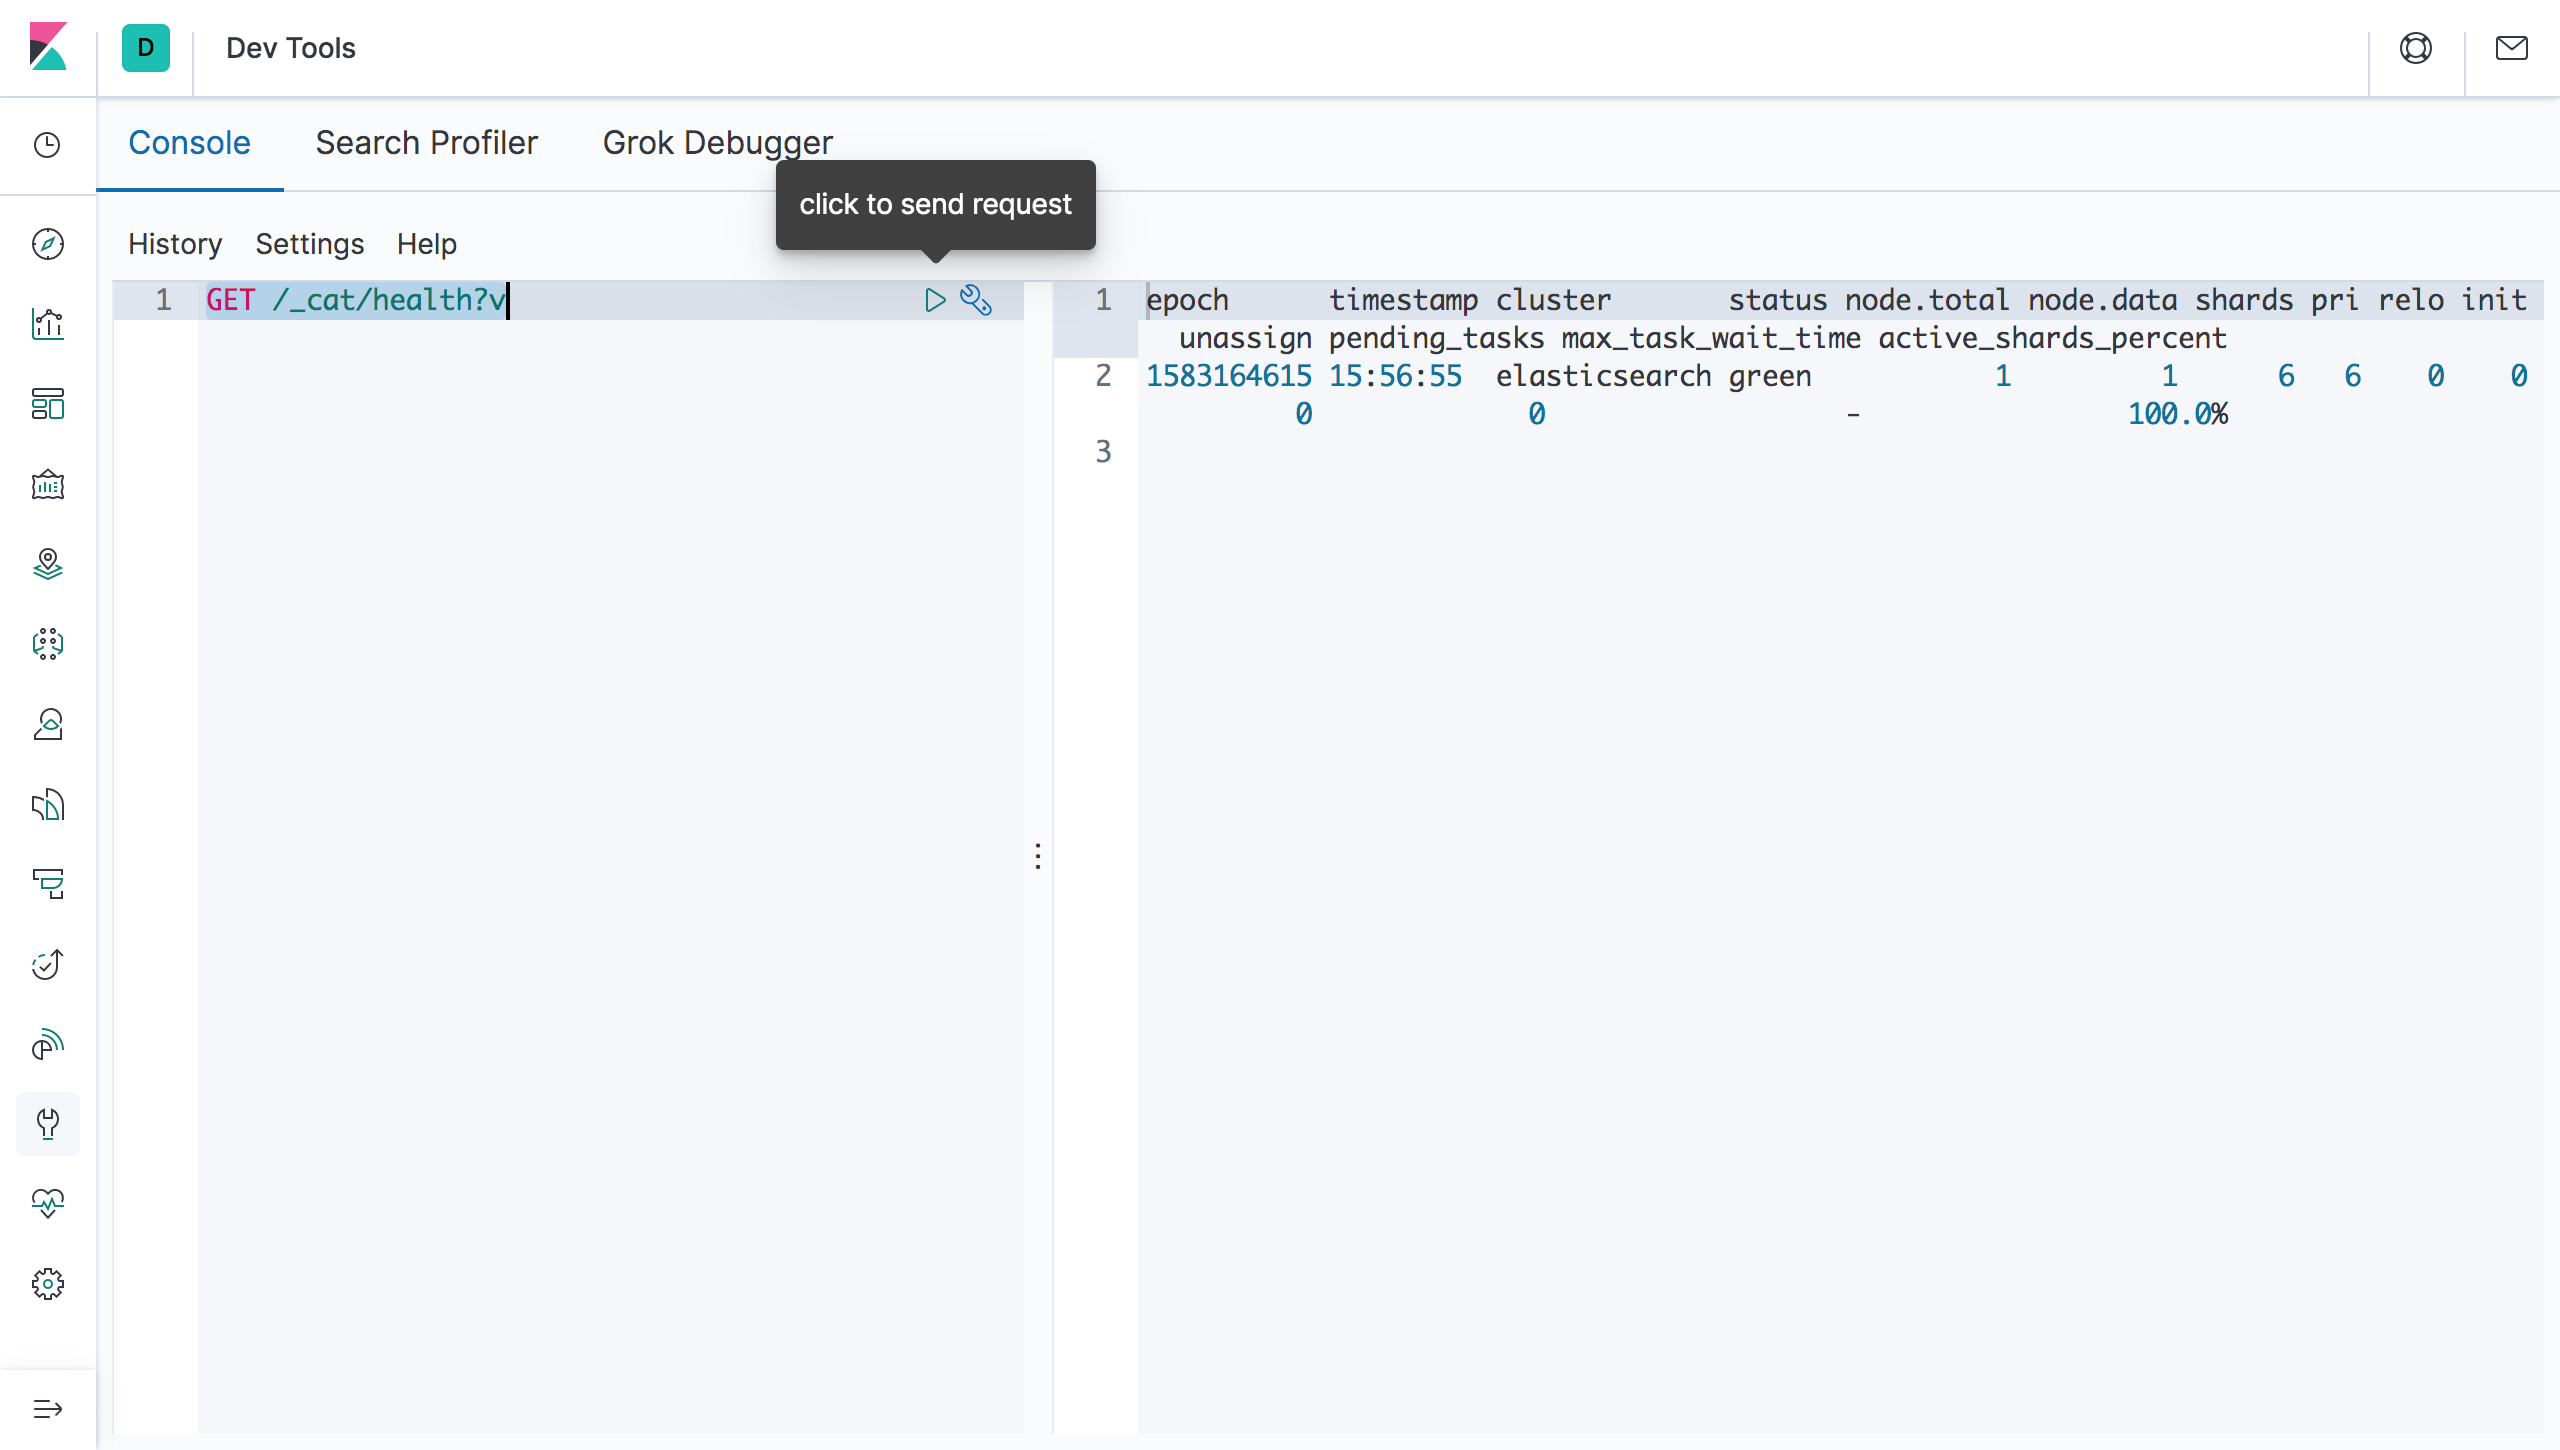
Run the same query we used to check the health of the Elasticsearch server.
GET /_cat/health?v
If everything is OK, and Kibana discovered and connected to the elasticsearch server, the results should come through and look like this.
All done. Elasticsearch and Kibana is setup now. Note that this default configuration is suitable for developers to get started. However for production environments you would likely want to configure both Elasticsearch and Kibana differently.
Basic Architecture
Before we get into anything else, let’s look at the Elasticsearch architecture. Elasticsearch is designed to handle big data and workloads, and thus distributed by nature.
Clusters and Nodes
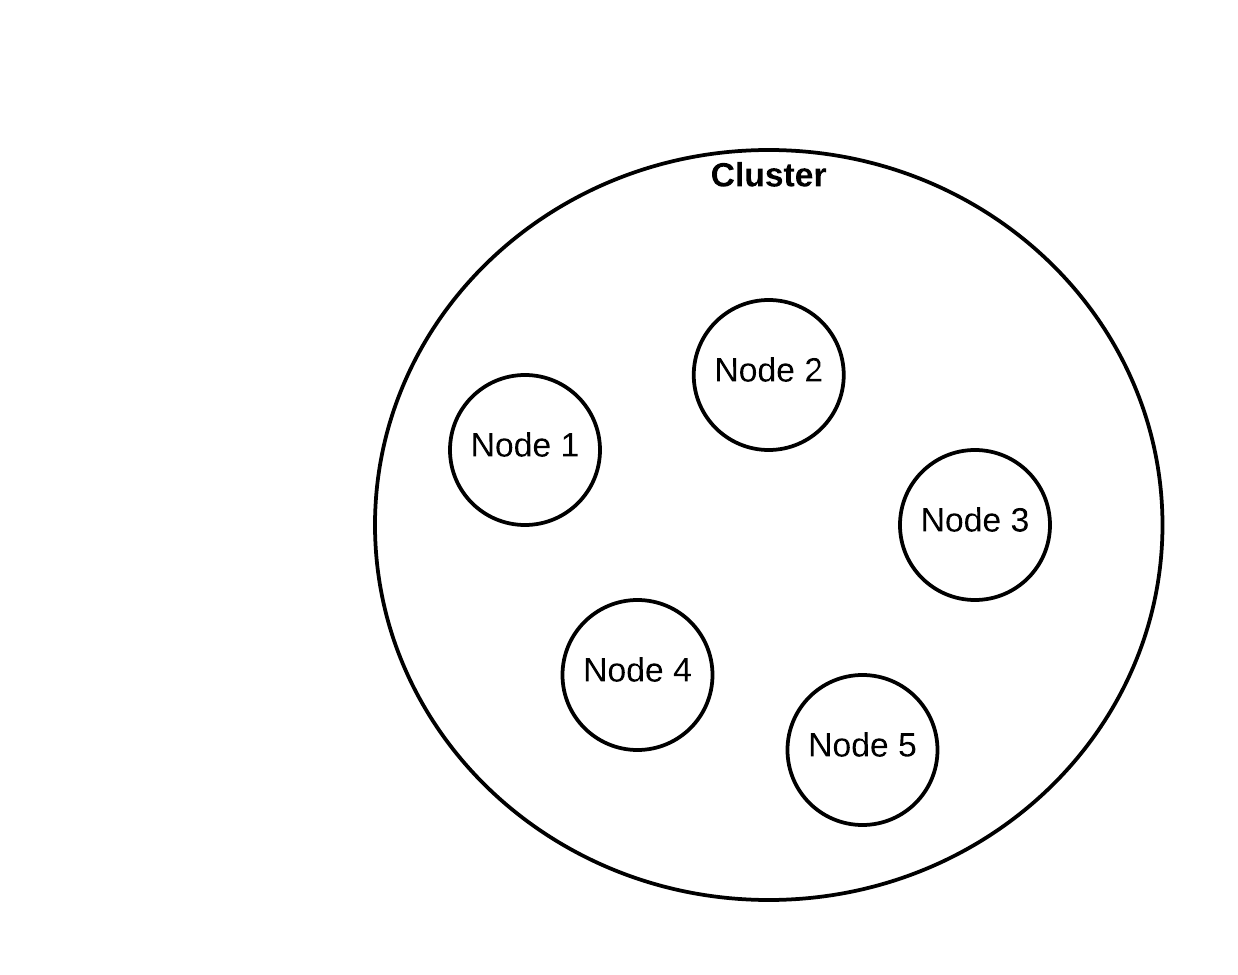
The largest abstraction in elasticsearch is a cluster. A cluster contains one or more nodes. A node is usually a single machine in a production environment running elasticsearch.
There are sevaral node types. Though I say types these are actually roles that each node fulfil. A node can fulfil more than one role.
- Data nodes — Stores data and performs operations related to data like aggregation and search.
- Master nodes — Controls configuration and management across the cluster like adding and removing nodes.
- Coordination only nodes — These are nodes that have all other roles disabled. The only function this type of nodes perform is forwarding/routing requests to the relevant master/data nodes. These basically load balancers.
- Ingest nodes — Pre-process documents before inserting them into elasticsearch (indexing)
Here is an illustration of a cluster with five nodes in it.
Indexes and Shards
Elasticsearch stores data inside indexes. An index is the largest logical data encapsulation available in Elasticsearch aside from operational containers like nodes and shards. If you are familiar with relational databases, an Elasticsearch index is similar to a database in postgresql or mysql.
Each node contains one or more shards. Remember how I said Elasticsearch is built on top of Lucene? Well a shard is a Lucene index. Logically you can think of a shard as a slice or a piece of your data. An index in Elasticsearch can grow in size until it can no longer fit inside a a single machine/node anymore. So we need to break that index into pieces. And those pieces are called shards. Sharding also enables distributed computing of data, which increases processing speed.
One thing worth noting is that the number of shards in an index cannot be changed after the index is created. To change the number of shards you have to essentially create a new index and copy the data in from the old index. The reason for this is the routing formula being used by elasticsearch. The routing formula is what decides which document goes into which shard. The formula takes the number of shards into consideration during it’s calculation (similar to the hashcode in a hash map). If we change the number of shards later, the algorithm could look for documents in the wrong shard. Or grow a shard disproportionately to the other shards.
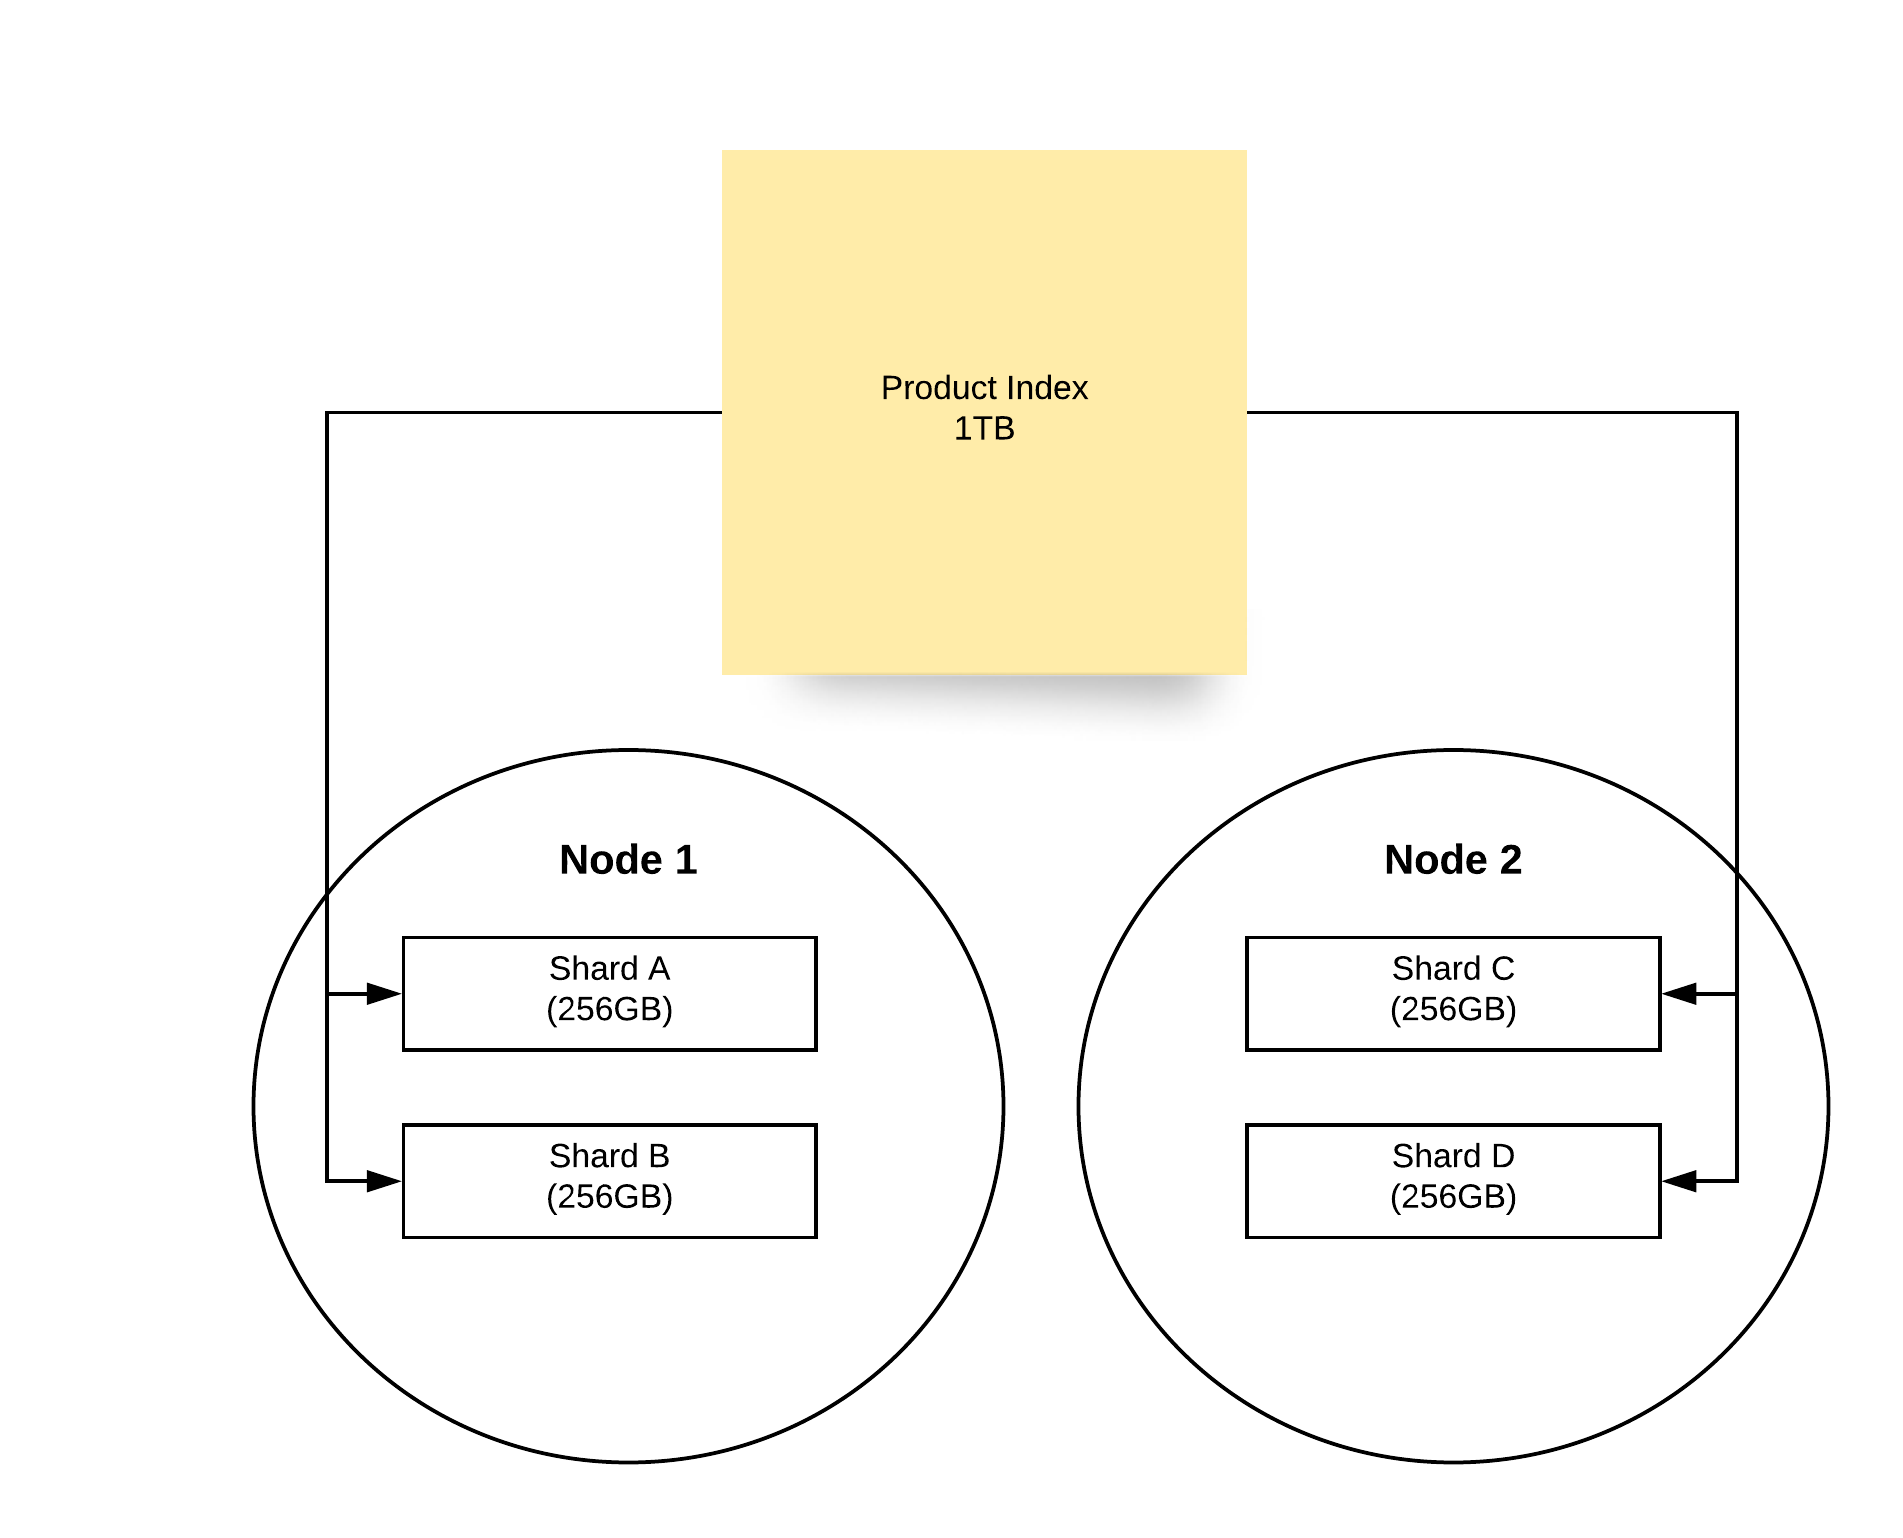
This is an illustration of an index of 1 TB broken down into 4 shards, each 256.
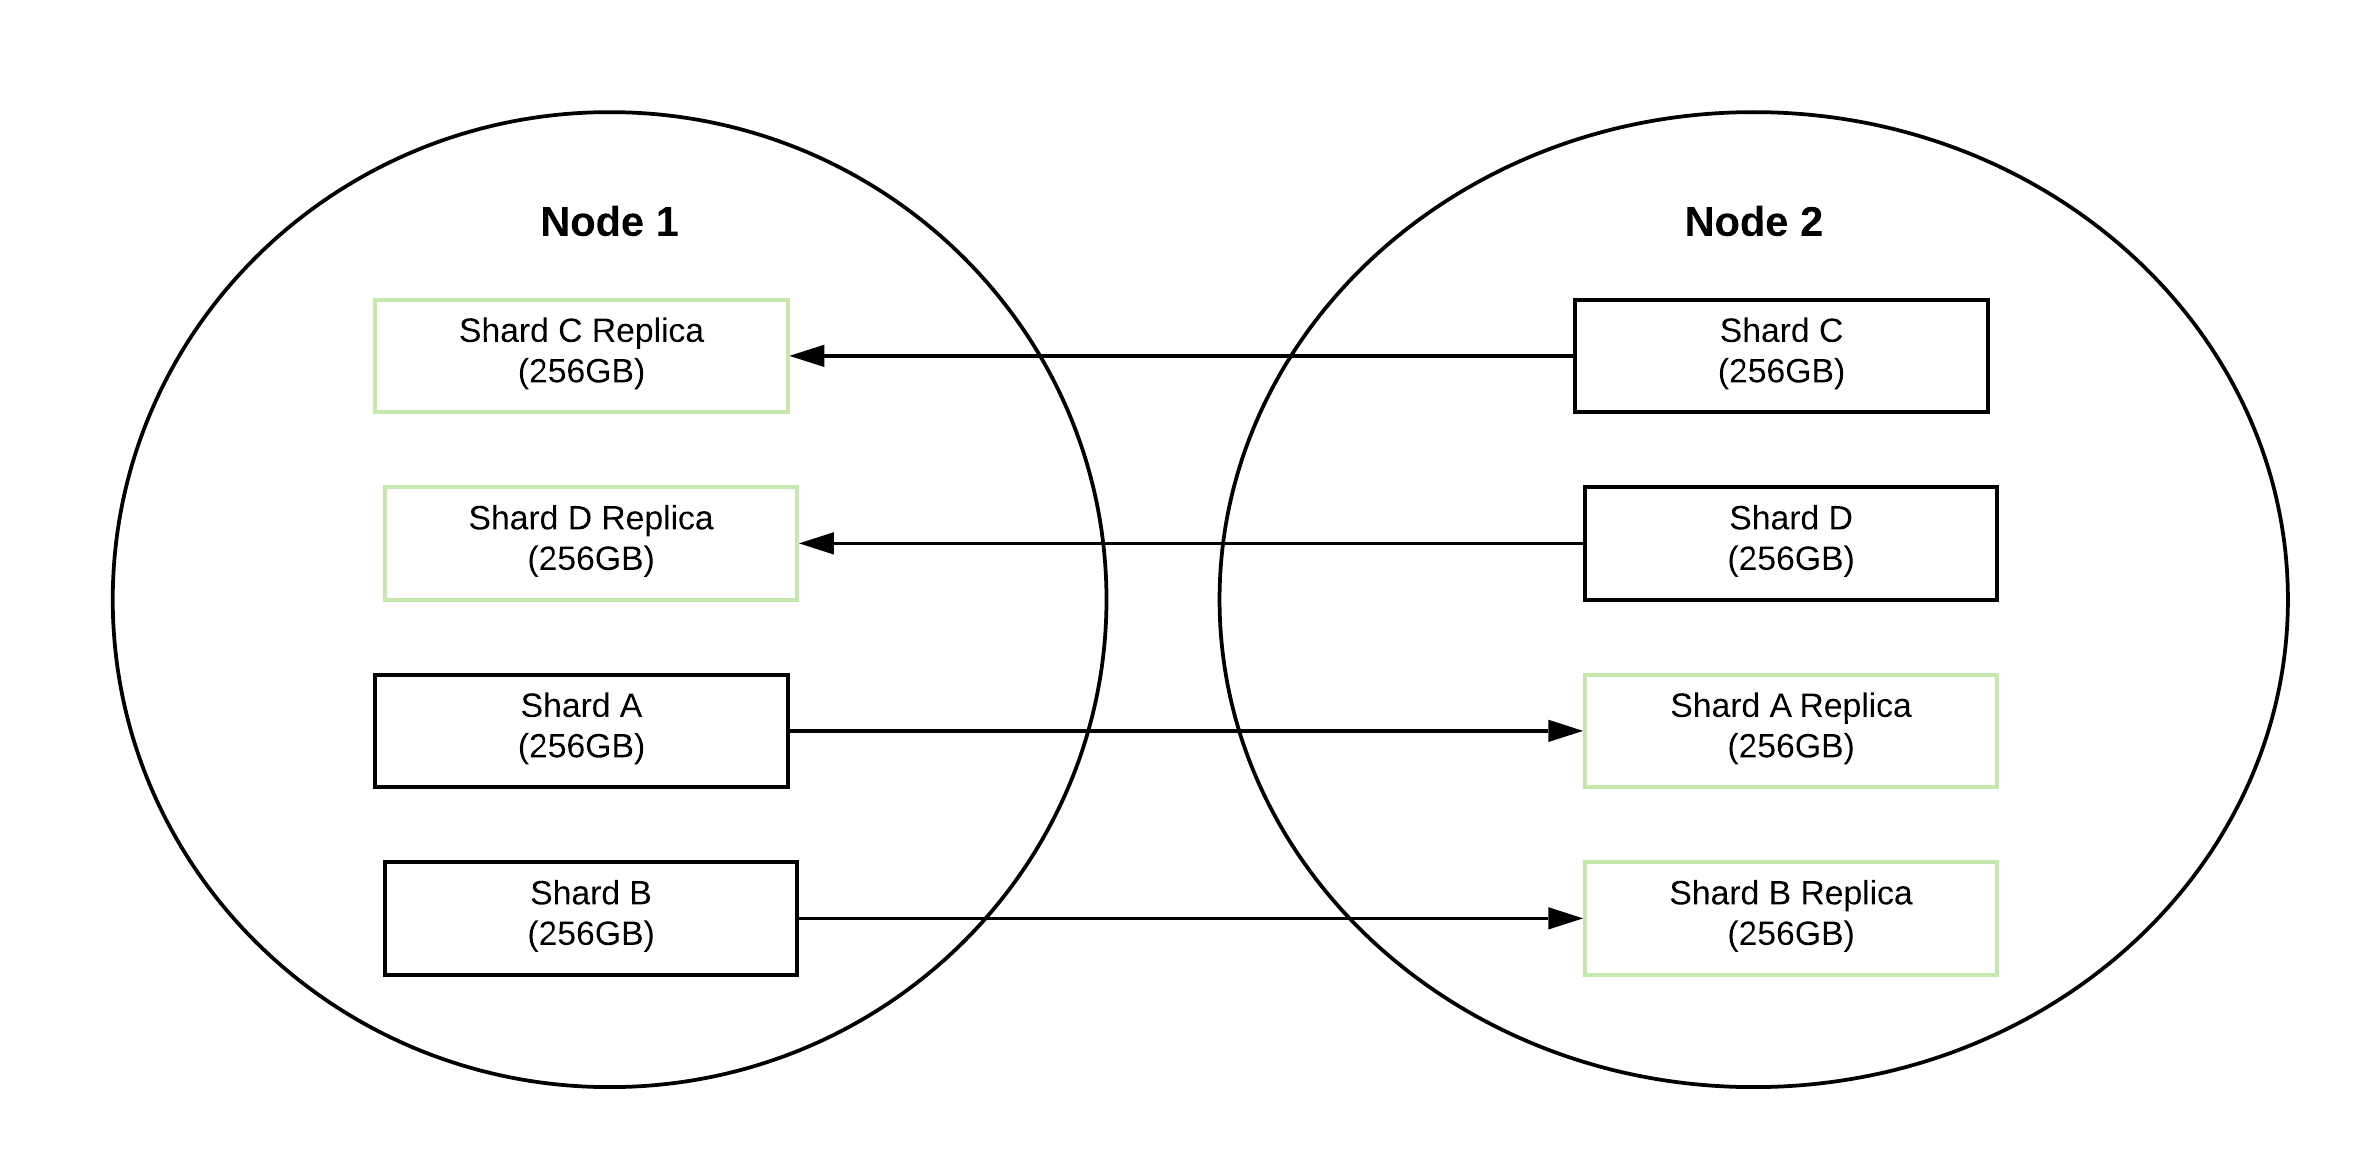
Replication
A distributed system needs to be fault tolerant. Elasticsearch achieves this by replication of data, so even if a node goes down the data is not lost. Elasticsearch replciates shards across nodes. A node doesn’t contain the replica shards of that node’s primary shards. So you always need more than 1 node to make replication work.
You can define the number of replicas when you create an index. A primary shard (the original shard) and it’s replicas are referred to as a replica group.
Here is an illustration of shards and their replica shards. There are two nodes in the cluster and 4 shards. The 4
shards are replicated across the two nodes.
Basic Operations
Let’s look at some of the basic operations we can perform in Elasticsearch. Note that the commands are in the Kibana dev tools format.
Data Storage
Elasticsearch stores data as documents inside indexes.
A document is similar to a row in a table and is stored as a JSON document. Imagine a e-commerce site where we have a lot of products. An index named products would contain the data inside elasticsearch. Products will be the documents stored inside the index.
An example product document would look similar to the following
{
  "name": "Kettle",
  "description": "A stainless steel kettle used to boil water for making tea, coffee and any other purpose",
  "features": ["stainless-steel", "whistling"],
  "categories": [{"name": "Home Appliances", "id":1}, {"name":"Electric Items", "id":10}],
  "stock": 10,
  "price": 1000.12
}
Create Index
First let’s create an index named products.
PUT /products
If the index was successfully created you should see the following results
{
  "acknowledged" : true,
  "shards_acknowledged" : true,
  "index" : "products"
}
Delete Index
To delete an index simply change the HTTP method to DELETE.
DELETE /products
If the index was successfully deleted you should see the following results
{
  "acknowledged" : true
}
Create Document
Let’s create the first document in our product index.
POST /products/_doc
{
    "name": "Kettle",
    "description": "A stainless steel kettle used to boil water for making tea, coffee and any other purpose",
    "features": ["stainless-steel", "whistling"],
    "categories": [{"name": "Home Appliances", "id":1}, {"name":"Electric Items", "id":10}],
    "stock": 10,
    "price": 1000.12
}
If the document was created successfully you should see the following response.
{
  "_index" : "products",
  "_type" : "_doc",
  "_id" : "jUZBn3ABMi3FvSGJka56",
  "_version" : 1,
  "result" : "created",
  "_shards" : {
    "total" : 2,
    "successful" : 1,
    "failed" : 0
  },
  "_seq_no" : 0,
  "_primary_term" : 1
}
Note that we have an ID created automatically. We can also provide our own custom ID by changing the PUT command a bit like this
POST /products/_doc/1
{
    "name": "Kettle",
    "description": "A stainless steel kettle used to boil water for making tea, coffee and any other purpose",
    "features": ["stainless-steel", "whistling"],
    "categories": [{"name": "Home Appliances", "id":1}, {"name":"Electric Items", "id":10}],
    "stock": 10,
    "price": 1000.12
}
You will get a response like this, note that the ID is now 1, which is the value we set.
{
  "_index" : "products",
  "_type" : "_doc",
  "_id" : "1",
  "_version" : 1,
  "result" : "created",
  "_shards" : {
    "total" : 2,
    "successful" : 1,
    "failed" : 0
  },
  "_seq_no" : 1,
  "_primary_term" : 1
}
List All Document
You can list all documents in an index by using the search API.
The following request searches for all documents inside the product index. This is the simplest search, similar to
select * sql query. We will look at the search API in much more details later in the series.
GET /products/_search
{
    "query" : {
        "match_all" : {}
    }
}
The response contains all the data in our products index.
{
  "took" : 255,
  "timed_out" : false,
  "_shards" : {
    "total" : 1,
    "successful" : 1,
    "skipped" : 0,
    "failed" : 0
  },
  "hits" : {
    "total" : {
      "value" : 2,
      "relation" : "eq"
    },
    "max_score" : 1.0,
    "hits" : [
      {
        "_index" : "products",
        "_type" : "_doc",
        "_id" : "jUZBn3ABMi3FvSGJka56",
        "_score" : 1.0,
        "_source" : {
          "name" : "Kettle",
          "description" : "A stainless steel kettle used to boil water for making tea, coffee and any other purpose",
          "features" : [
            "stainless-steel",
            "whistling"
          ],
          "categories" : [
            {
              "name" : "Home Appliances",
              "id" : 1
            },
            {
              "name" : "Electric Items",
              "id" : 10
            }
          ],
          "stock" : 10,
          "price" : 1000.12
        }
      },
      {
        "_index" : "products",
        "_type" : "_doc",
        "_id" : "1",
        "_score" : 1.0,
        "_source" : {
          "name" : "Kettle",
          "description" : "A stainless steel kettle used to boil water for making tea, coffee and any other purpose",
          "features" : [
            "stainless-steel",
            "whistling"
          ],
          "categories" : [
            {
              "name" : "Home Appliances",
              "id" : 1
            },
            {
              "name" : "Electric Items",
              "id" : 10
            }
          ],
          "stock" : 10,
          "price" : 1000.12
        }
      }
    ]
  }
}
Note the two items we inserted before (same data, different IDs) are present in the results.
Get Document By ID
You can retrieve a single document by it’s id
GET /products/_doc/1
You get data about the product document that has the ID 1
{
  "_index" : "products",
  "_type" : "_doc",
  "_id" : "1",
  "_version" : 1,
  "_seq_no" : 1,
  "_primary_term" : 1,
  "found" : true,
  "_source" : {
    "name" : "Kettle",
    "description" : "A stainless steel kettle used to boil water for making tea, coffee and any other purpose",
    "features" : [
      "stainless-steel",
      "whistling"
    ],
    "categories" : [
      {
        "name" : "Home Appliances",
        "id" : 1
      },
      {
        "name" : "Electric Items",
        "id" : 10
      }
    ],
    "stock" : 10,
    "price" : 1000.12
  }
}
Update Document
We can update documents in a few ways. Note that Elasticsearch documents are immutable.
The update API is basically retrieving a record, changing the relevant fields and replacing the old document with the new one.
The only advantage of using the update API instead of doint the retrieval and replacement ourselves is that it saves a network round trip.
Update individual attributes
You can update individual attributes by making a request like this. This request updates the categories of the product with ID 1
POST /products/_update/1
{
  "doc":{
    "categories" : [{"heating":1}]
  }
}
If the update is successful you will get the following response.
{
  "_index" : "products",
  "_type" : "_doc",
  "_id" : "1",
  "_version" : 2,
  "result" : "updated",
  "_shards" : {
    "total" : 2,
    "successful" : 1,
    "failed" : 0
  },
  "_seq_no" : 2,
  "_primary_term" : 1
}
Scripted Updates
You can use scripting in your updates as well. An scripting update is simply the ability to add logic to the update query.
We will quickly go through a few examples for you to get an idea about what a scripted update is.
The following example updates the record with ID 1 by accessing a variable named ctx (short for context) and then access the record via the variable _source and finally update the stock field by setting it to 9.
POST /products/_update/1
{
  "script": {
    "source": "ctx._source.stock = 9"
  }
}
This example decreases the existing stock by 1.
POST /products/_update/1
{
  "script": {
    "source": "ctx._source.stock--"
  }
}
Successful responses to both requests above look like the following
{
  "_index" : "products",
  "_type" : "_doc",
  "_id" : "1",
  "_version" : 3,
  "result" : "updated",
  "_shards" : {
    "total" : 2,
    "successful" : 1,
    "failed" : 0
  },
  "_seq_no" : 3,
  "_primary_term" : 1
}
You can also do a lot of things in scripting updates like use logical conditions, delete records etc.
Upserts
You can also do an upsert - update or insert, operations using the udpate API.
The following request will update the product with ID 2 if it exists, if not it will create the new record.
POST /products/_update/2
{
  "script": {
    "source": "ctx._source.stock--"
  },
  "upsert":{
     "name": "Pot",
     "description": "A stainless steel pot used to cook.",
     "features": ["stainless-steel"],
     "categories": [{"name": "Home Appliances", "id":1}],
     "stock": 10,
     "price": 200
   }
}
First time we run the request this is the response. Note that the result is created.
{
  "_index" : "products",
  "_type" : "_doc",
  "_id" : "2",
  "_version" : 1,
  "result" : "created",
  "_shards" : {
    "total" : 2,
    "successful" : 1,
    "failed" : 0
  },
  "_seq_no" : 4,
  "_primary_term" : 1
}
Second time we get the following response, Note that the result is now updated.
{
  "_index" : "products",
  "_type" : "_doc",
  "_id" : "2",
  "_version" : 2,
  "result" : "updated",
  "_shards" : {
    "total" : 2,
    "successful" : 1,
    "failed" : 0
  },
  "_seq_no" : 5,
  "_primary_term" : 1
}
Update documents by query
You can update multiple documents via a query. This is similar to how we use sql updates with the where clause.
The updates are done in a similar fashion to the scripted updates we talked about earlier. And the query part is the same as what we used to list all documents in the index. We can of course change the query to match only the data we want, but we will look at that when we cover search API in more detail later.
POST /products/_update_by_query
{
  "script":{
    "source": "ctx._source.stock--",
    "price": 199.99
  },
  "query":{
    "match_all": {}
  }
}
The response tells us how many documents were updated via the updated column.
{
  "took" : 356,
  "timed_out" : false,
  "total" : 3,
  "updated" : 3,
  "deleted" : 0,
  "batches" : 1,
  "version_conflicts" : 0,
  "noops" : 0,
  "retries" : {
    "bulk" : 0,
    "search" : 0
  },
  "throttled_millis" : 0,
  "requests_per_second" : -1.0,
  "throttled_until_millis" : 0,
  "failures" : [ ]
}
Also worthy of note is the failure array in the response. This will contain data about the failed updated, if any
fails. Note that updates are not atomic, nor run inside a transaction. If an udpate fails due to some reason, then
the documents that are already updated are not rolled back.
Delete a document by ID
Deleting a document by ID is pretty simple. You just need to issue the following request
DELETE /products/_doc/1
Deleting documents by a query
You can also delete documents via a query to delete multiple documents. It’s similar to how we updated multiple documents, only the API differs.
The following request will delete all products in the index.
POST /products/_delete_by_query
{
  "query":{
    "match_all": {}
  }
}
Here’s the response giving us data about how many documents were deleted in the
{
  "took" : 190,
  "timed_out" : false,
  "total" : 3,
  "deleted" : 3,
  "batches" : 1,
  "version_conflicts" : 0,
  "noops" : 0,
  "retries" : {
    "bulk" : 0,
    "search" : 0
  },
  "throttled_millis" : 0,
  "requests_per_second" : -1.0,
  "throttled_until_millis" : 0,
  "failures" : [ ]
}
Keep in mind that the behaviour is also very similar to the update by query API, and this is not run in a transaction or executed atomically.
Replacing a document
You can replace a document completely by using the following request.
PUT /products/_doc/1
{
  "name": "Blender",
  "description": "A blender that can be used to make juice and grind spices",
  "features": ["stainless-steel", "sturdy"],
  "categories": [{"name": "Home Appliances", "id":1}, {"name":"Electric Items", "id":10}],
  "stock": 5,
  "price": 6000
}
You would get the following response if the product with an ID of 1 was replaced successfully with the new product.
{
  "_index" : "products",
  "_type" : "_doc",
  "_id" : "1",
  "_version" : 6,
  "result" : "updated",
  "_shards" : {
    "total" : 2,
    "successful" : 1,
    "failed" : 0
  },
  "_seq_no" : 8,
  "_primary_term" : 1
}
There are various other operations that you can perform on elasticsearch and it’s data. But these operations are enough for us to get started.
You should also look up how to lock optimistically with elasticsearch. However we will be focusing strictly on search capabilities and won’t be covering features in elasticsearch that isn’t strictly required for this operation.
Optimistic Locking
Elasticsearch is distributed and asynchronous in nature. Because of this, there can be instances where writes come in out of proper sequence to the nodes. We might also have a user update a document that was already updated with another change.
Think about two customers purchasing the same product and the application sending a stock update request simultaneously. If we didn’t have optimistic locking the results of the request would be unpredictable and wrong, and we would have no way of knowing about it.
We can use the seq_no and the primary_term fields.
Elasticsearch assigns a sequence number to every operation performed to a document by the primary shard (remember that’s the main shard, not the replicas). The sequence is consequently incremented as the number of operations done to a document is increased. Note that this is the number of modifications done to documents in the shard. Not the modifications done to a specific document.
Before we understand what the primary term means, we need to understand what happens to the replica shards, when a node fails and takes all the shards along with it. When that happens a replica will be chosen from the existing replica shards to be the primary shard.
Primary term is the number of times this happened.
Now what this helps prevent and how is an interesting topic - you can read more about it here. For our purposes let’s see how to simply use these fields to perform optimistic locking.
If you perform a direct get on an object by it’s ID, then you get the _seq_no and _primary_term values in the
response (See “Get Document By ID” section).
However when you are performing a search operation these are not returned unless you explicitly state that you need
them by appending the seq_no_primary_term parameter like this.
GET /products/_search?seq_no_primary_term=true
{
    "query" : {
        "match_all" : {}
    }
}
As you can see, the response contains the _seq_no and _primary_term parameters.
{
  "took" : 13,
  "timed_out" : false,
  "_shards" : {
    "total" : 1,
    "successful" : 1,
    "skipped" : 0,
    "failed" : 0
  },
  "hits" : {
    "total" : {
      "value" : 3,
      "relation" : "eq"
    },
    "max_score" : 1.0,
    "hits" : [
      {
        "_index" : "products",
        "_type" : "_doc",
        "_id" : "jUZBn3ABMi3FvSGJka56",
        "_version" : 1,
        "_seq_no" : 0,
        "_primary_term" : 1,
        "_score" : 1.0,
        "_source" : {
          "name" : "Kettle",
          "description" : "A stainless steel kettle used to boil water for making tea, coffee and any other purpose",
          "features" : [
            "stainless-steel",
            "whistling"
          ],
          "categories" : [
            {
              "name" : "Home Appliances",
              "id" : 1
            },
            {
              "name" : "Electric Items",
              "id" : 10
            }
          ],
          "stock" : 10,
          "price" : 1000.12
        }
      },
      {
        "_index" : "products",
        "_type" : "_doc",
        "_id" : "2",
        "_version" : 2,
        "_seq_no" : 5,
        "_primary_term" : 1,
        "_score" : 1.0,
        "_source" : {
          "name" : "Pot",
          "description" : "A stainless steel pot used to cook.",
          "features" : [
            "stainless-steel"
          ],
          "categories" : [
            {
              "name" : "Home Appliances",
              "id" : 1
            }
          ],
          "stock" : 9,
          "price" : 200
        }
      },
      {
        "_index" : "products",
        "_type" : "_doc",
        "_id" : "1",
        "_version" : 6,
        "_seq_no" : 8,
        "_primary_term" : 1,
        "_score" : 1.0,
        "_source" : {
          "name" : "Blender",
          "description" : "A blender that can be used to make juice and grind spices",
          "features" : [
            "stainless-steel",
            "sturdy"
          ],
          "categories" : [
            {
              "name" : "Home Appliances",
              "id" : 1
            },
            {
              "name" : "Electric Items",
              "id" : 10
            }
          ],
          "stock" : 5,
          "price" : 6000
        }
      }
    ]
  }
}
To perform optimistic locking we need to utilize the if_seq_no and if_primary_term parameters. Let’s update the
product with ID 1 with an old sewuence number,
Let’s use the following request. Note that the if_seq_no value is 7, while the current value is 8.
POST /products/_update/1?if_seq_no=7&if_primary_term=1
{
  "doc":{
    "stock" : 4
  }
}
The response status is 409 and we can see an error message saying there’s a version conflict. This is because the document with ID 1 was last modified at the sequence number 8 (the modification operation was assigned sequence number 8). The sequence number must match exactly for the update to go through, it cannot be higher than the current sequence number either.
Note that there could be sequence numbers higher or lower than 8 in other documents, but the modification operation only need a sequence number higher than the one in the document to be able to succeed; Because the operations with those higher sequence numbers didn’t affect the document we are trying to modify. Remember that the sequence numbers are scoped at the shard level, not at the document level.
{
  "error" : {
    "root_cause" : [
      {
        "type" : "version_conflict_engine_exception",
        "reason" : "[1]: version conflict, required seqNo [7], primary term [1]. current document has seqNo [8] and primary term [1]",
        "index_uuid" : "ewTDLzSYQc-ihDNyPdxoeQ",
        "shard" : "0",
        "index" : "products"
      }
    ],
    "type" : "version_conflict_engine_exception",
    "reason" : "[1]: version conflict, required seqNo [7], primary term [1]. current document has seqNo [8] and primary term [1]",
    "index_uuid" : "ewTDLzSYQc-ihDNyPdxoeQ",
    "shard" : "0",
    "index" : "products"
  },
  "status" : 409
}
Let’s do the update again with the proper sequence number.
POST /products/_update/1?if_seq_no=8&if_primary_term=1
{
  "doc":{
    "stock" : 4
  }
}
And it succeeds
{
  "_index" : "products",
  "_type" : "_doc",
  "_id" : "1",
  "_version" : 7,
  "result" : "updated",
  "_shards" : {
    "total" : 2,
    "successful" : 1,
    "failed" : 0
  },
  "_seq_no" : 10,
  "_primary_term" : 1
}
We have now looked at how to setup elasticsearch for development, and how to perform basic operations on the data. If you are interested I encourage you to read more about each of these areas since we only looked at these features briefly.